Recipes from pasta master Evan Funke
Evan Funke grew up in Southern California, the son of an Oscar-winning special effects photographer. But he decided to make his magic with food. After working with Wolfgang Puck at the iconic Spago in Beverly Hills, he headed off to study pasta making in Italy. Now, his creations are on the menu at his Felix Trattoria in Venice, California.
This week, he released his debut cookbook "American Sfoglino" teaching readers how to make artisanal pasta at home.
Here are some of Funke's signature recipes:
Panzanella Salad
Ingredients:
5 mixed heirloom tomatoes, cut into large obliques
1 Persian cucumbers, cut into large obliques
1 bunch basil, picked and torn
1 bunch Italian parsley, picked and torn
1 red onion, shaved finely on benriner
Olive Oil
1 loaf ciabatta sliced in 1-inch cubes/obliques (same size as tomatoes)
¼ lb wild arugula
Red wine vinegar
Olive oil
Salt
Black pepper
1 ball burrata mozzarella
Instructions:
- Slice the tomatoes into large obliques. Then slice the cucumbers into large obliques. Place the tomatoes and cucumbers in a large bowl and add the basil, parsley, and red onion. Set aside.
- Cube the ciabatta into 1-inch obliques, following the size of the cut tomatoes. In a large skillet over medium heat, add the olive oil. Once hot, add the cubed bread and fry until golden brown and crispy, 3 minutes on each side. Transfer to a large plate and set aside.
- Add the arugula to the large salad bowl and dress with red wine vinegar, olive oil, salt, and pepper to taste. When ready to serve, add the bread and gently toss once more to coat. Add the burrata to the top of the salad and serve.
Rucola Salad
TOMATO SAUCE BASE
Ingredients:
½ lb wild arugula
1 red onion sliced thin on benriner
Juice of 1 lemon
Olive oil
Salt
Black pepper
¼ lb parmigiano reggiano
Instructions:
- In a large bowl, dress the arugula and onion with the lemon juice, olive oil, salt, and black pepper to taste. Shave the parmigiano reggiano directly over the salad and serve.
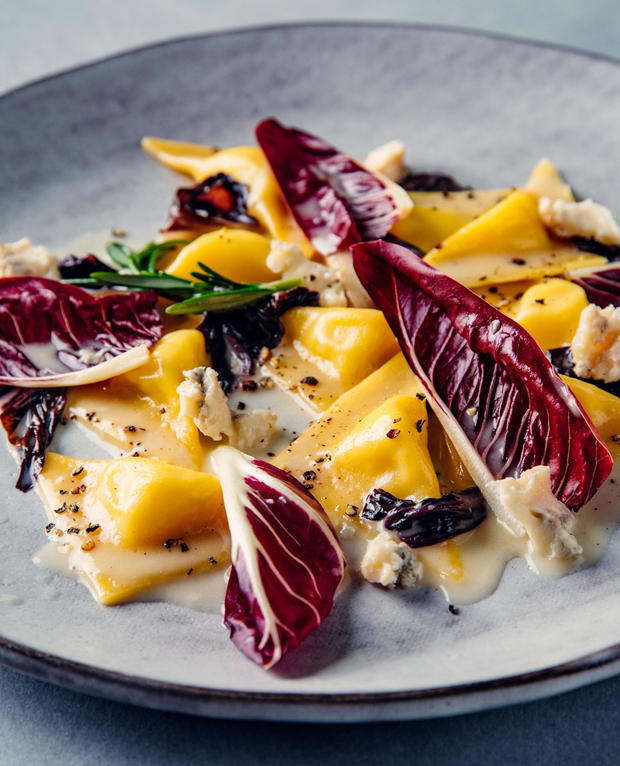
Triangoli with gorgonzola, radicchio and rosemary
Reprinted from American Sfoglino by Evan Funke with permission by Chronicle Books, 2019
Gorgonzola is often paired with bitter radicchio, creating a beautiful flavor contrast. I like to use Treviso, but you can use any type of radicchio you wish, or even substitute escarole, dandelion greens, or chicory. Serves 6.
4 tbsp [56 g] unsalted butter
2 sprigs rosemary
½ medium head radicchio,
Cut into bite-size pieces
Kosher salt
Freshly ground black pepper
1 recipe triangoli (recipe follows) filled with ripieno di formaggio (recipe follows)
½ cup [50 g] finely grated parmigiano-reggiano
In a large sauté pan or skillet over medium-high heat, melt the butter until frothy and golden. Add the rosemary and cook until fragrant, about 15 seconds. Add the radicchio and season with salt and pepper. Cook, tossing and stirring, until the leaves are wilted, about 2 minutes. Set the sauce aside.
Bring a large pot of water to a rolling boil over high heat. Season the water with salt. When the salt dissolves, add the triangoli and cook until tender, 2½ to 3 minutes.
Meanwhile, return the sauce to medium heat. Using a spider, transfer the pasta to the sauce and swirl to coat. Add some pasta cooking water, as needed, to loosen the sauce. Serve immediately with the Parmigiano-Reggiano sprinkled on top.
TRIANGOLI
Makes about 1.5 kg [53 oz],
1 recipe sfoglia all'uovo (recipe follows), at room temperature
1 recipe ripieno di formaggio (recipe follows)
"00" flour, for dusting
Roll one dough ball to a thickness of 9 Post-it® Notes on a lightly floured work surface. Set it aside on your work surface, uncovered, for 2 to 3 minutes to dry slightly.
Cover the sfoglia with plastic and let rest for 2 to 3 minutes more.
Set an accordion pastry cutter to 2½ in [6 cm]. Use firm and even pressure to cut the sfoglia into strips, moving from south to north. The edge of the pastry cutter should graze the west edge of the sfoglia. If the pasta isn't cut all the way through, clean up the rows using a sharp knife.
Beginning at the bottom edge of the sfoglia, use firm and even pressure to cut the pasta into strips, east to west.
Clear away any irregular pieces and add them to your maltagliati pile.
FILL THE TRIANGOLI: Transfer your ripieno of choice to a pastry bag (no tip needed). Cover the pasta with a clean, unscented plastic trash can liner, leaving the first row, closest to you, exposed. Pipe a grape-size amount (about 2 tsp) of filling in the middle of each pasta piece.
SHAPE THE TRIANGOLI: Orient a piece of pasta as a diamond. Using your thumb and index finger, fold the southern tip of the diamond up and over the filling. Join it to the northern tip and seal by pressing the tips together with your thumb and index finger to a single thickness. Align your index fingers along the edges of the triangle, forming an inverted "V." Press firmly to seal the entire triangle and create a single thickness.
Transfer the filled pasta to a clean work surface and let dry, uncovered, for 15 minutes. The triangoli are ready to use now, or you can blanch them for future use (see sidebar).
Meanwhile, repeat the process with the remaining dough ball and filling.
BLANCHING FILLED PASTA FOR FUTURE USE
Line a work surface with a clean nonterry cloth kitchen towel. Bring a large pot of water to a rolling boil over high heat. Lightly season with salt.
Working in batches to avoid overcrowding, gently drop the filled pasta into the boiling water. As soon as they float, using a spider, transfer to the towel-lined work surface, making sure they are not touching. Repeat with the remaining pasta. If possible, direct a fan on low speed at the pieces to dry them.
Turn them every 5 minutes or so until they are completely dry, about 20 minutes with the fan and up to 40 minutes without.
The pasta will keep, refrigerated in an airtight container, for up 10 days or frozen for up to 3 months. When cooking blanched pasta, deduct 15 to 20 seconds from the recommended cooking time.
When cooking frozen pasta, cook for 2 minutes longer than the recipe calls for, then begin testing for doneness.
EGG DOUGH
The classic recipe for sfoglia all'uovo uses 100 g of flour per large egg. In Bologna, sfoglini eyeball these ingredients, making adjustments as needed until they can feel with their fingertips that the dough is perfectly developed, a sign it will roll out into a proper sfoglia. What they are really feeling is a dough that is hydrated and has reached the ideal balance of elasticity and extensibility. If a dough has too much elasticity, it will keep bouncing back and be impossible to roll out to the desired diameter—and, by extension, thinness. If, on the other hand, the dough is too extensible (too easy to push and pull), it is overly hydrated and it will be nearly impossible for it to hold its shape once rolled.
Unlike in American restaurant kitchens, in Bologna intense debates about hydration are "not a thing." Bolognesi feel the dough and—with lots of practice—you may, too. But here I think it's essential to provide a more concrete recipe with fewer variables.
After years of experimentation, I landed on a recipe that is easy to nail anywhere. It features a precise proportion of egg to flour, which results in a 57 percent hydration dough—hydration level refers to the proportion of liquid to flour—making it especially ideal for filled pasta such as tortellini.
The moisture from the egg hydrates the flour, activating the gluten. Meanwhile, the egg white and yolk provide protein and fat, respectively, lending strength, pliability, and elasticity. I have engineered the dough so all these features are in balance and the resulting pasta has the structure and strength needed for both cut and filled pasta shapes. To that end and as noted in "Measurements", I use metric units ONLY for my Master Dough sfoglia recipes. Giving both the flour and egg measurements in grams ensures a better, more consistent result. Using grams also eliminates the variable of using whole eggs, which can vary slightly in weight.
454 g [1 lb] "00" flour, plus more
For dusting
258 g [9.1 oz] eggs, beaten
MAKE THE PASTA DOUGH: Sift the flour onto your work surface and make an 8 in [20 cm] diameter well in the center. You should be able to see the work surface in the middle and the well's walls should be high enough to contain the eggs.
Pour the eggs into the well. Working from the interior edge of the well, use a fork to incorporate a bit of the flour with the eggs. Continue incorporating a bit of flour at a time until the dough is the consistency of pancake batter.
Clean off any flour mixture stuck to the fork and add it to the dough.
Using a bench scraper, scrape any remaining flour from the work surface into the dough. Working in a clockwise motion, cut the dough together as though you are making biscuits: scrape, fold, and cut (see previous spread). Continue working the dough until a shaggy mass forms, 2 to 3 minutes. Parts of the mass will be rather wet, while other parts will be floury. Scrape any dough from the bench scraper into the mass.
KNEAD THE PASTA DOUGH: With both hands, pull the far end of the dough toward you quickly and energetically, fold it over itself, then push it away from you using the heels of your palms. Rotate the dough a quarter turn and repeat the kneading for 3 to 5 minutes until the dough is a compact mass. The dough will be slightly tacky.
Using the bench scraper, scrape any dry bits of dough from your work surface and discard. Wash, but do not dry, your hands and continue kneading the dough as before until it is relatively smooth with a cellulitelike texture, an indication of gluten formation, 3 to 5 minutes more.
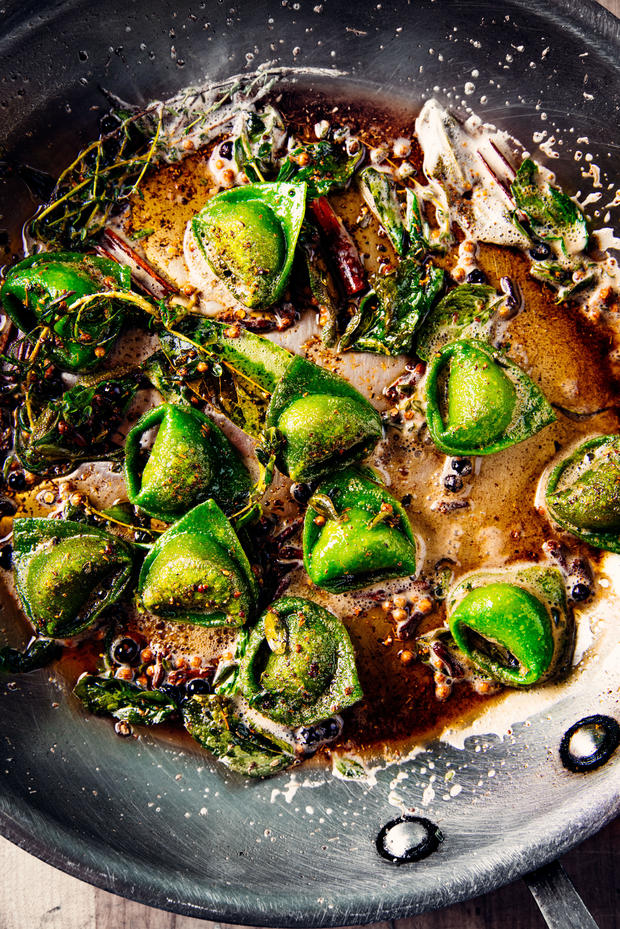
Balanzoni with butter, herbs and spices
Reprinted from American Sfoglino by Evan Funke with permission by Chronicle Books, 2019
The first time I saw this dish, I was put off—the buttery sauce was a mess of woody sprigs, a veritable minefield of nature. Until that point I had spent most of my career meticulously picking the leaves off herb stems and hadn't yet experienced the low-key approach of tossing entire sprigs into a pan, frying them in butter, and tossing the perfumed lot onto a finished dish. As I've since learned, the result is unbelievably flavorful and the process unimaginably liberating.
SERVES 6
16 tbsp [2 sticks, or 224 g] unsalted butter, cut into pieces
4 whole cloves
One 2 in [5 cm] cinnamon stick, broken in half
1 sprig rosemary
1 sprig thyme
1 sprig marjoram
1 fresh bay leaf, torn, or 1 dried bay leaf, whole
4 fresh sage leaves, torn
10 fresh mint leaves, torn
4 fresh basil leaves, torn
Scant tsp fennel pollen (optional)
Small pinch of nutmeg, preferably freshly grated
Kosher salt
1 recipe balanzoni (recipe follows)
1 cup [100 g] finely grated parmigiano-reggiano
Instructions:
In a large sauté pan or skillet over medium heat, melt the butter until frothy and golden. Add the cloves, cinnamon stick, rosemary, thyme, marjoram, bay leaf, and sage and cook until fragrant, about 10 seconds.
Add the mint, basil, fennel pollen (if using), and nutmeg and swirl for 5 to 10 seconds to combine. Set the sauce aside.
Bring a large pot of water to a rolling boil over high heat. Season the water with salt. When the salt dissolves, add the balanzoni and cook until tender, 2½ to 3 minutes.
Return the sauce to medium heat.
Using a spider, transfer the pasta to the sauce, gently shaking off as much water as possible. Immediately begin swirling the pasta to coat. Serve immediately with the Parmigiano-Reggiano sprinkled on top.
BALANZONI
1 recipe sfoglia verde agli spinaci (recipe follows), at room temperature
"00" flour, for dusting
1½ lb [681 g] mortadella, cut into 1 in [2.5 cm] cubes
12 oz [340 g] ricotta
4 oz [113.5 g] mascarpone
½ cup [50 g] finely grated parmigiano-reggiano
2 tbsp chopped fresh flat-leaf parsley
Instructions:
Roll one dough ball to a thickness of 9 Post-it® Notes on a lightly floured work surface. Set it aside on your work surface, uncovered, for 2 to 3 minutes to dry slightly.
Cover the sfoglia with plastic and let rest for 2 to 3 minutes more.
Set an accordion pastry cutter to 3 in [7.5 cm]. Use firm and even pressure to cut the sfoglia into strips, moving from south to north. The edge of the pastry cutter should graze the west edge of the sfoglia. Beginning at the bottom edge of the sfoglia, use firm and even pressure to cut the sfoglia into strips, east to west. Clear away any irregular pieces and add them to your maltagliati pile. Cover the sfoglia with a clean, unscented plastic trash can liner, leaving the first row, closest to you, exposed.
MAKE THE FILLING: Using a meat grinder, or a grinder attachment, fitted with a medium die, grind the mortadella two times into a large bowl.
Add the ricotta, mascarpone, and Parmigiano-Reggiano. Using a rubber spatula, fold the ingredients together until very smooth, about 1 minute.
Fold in the parsley. Transfer the filling to a pastry bag (no tip needed).
The filling will keep, refrigerated in the pastry bag (cover the exposed end) or an airtight container, for up to 3 days. Use at room temperature.
FILL THE BALANZONI: Pipe a chestnut-size amount (about 1 Tbsp) of ripieno in the middle of each pasta piece.
SHAPE THE BALANZONI: Orient a piece of pasta as a diamond in the palm of one hand. Using your thumb and index finger, fold the southern tip of the diamond up and over the filling.
Join it to the northern tip, forming a triangle. Using those same two fingers, seal the triangle just at the top, pressing the pasta to a single thickness.
With the same hand, use your thumb and index finger to connect and seal one edge of the triangle. Transfer the pasta to your opposite hand, and seal the remaining edge of the triangle.
Transfer the sealed triangle back to your other hand, gripping it with your index finger and thumb at the pressed tip. To make the fold, support the bottom of the filling with a hooked index and middle finger. With your thumb, fold the sealed flap toward you, gently forming a crease on that side while running your thumb from the top of the triangle down toward the tip.
Once at the tip, delicately grip the crease with your thumb and hooked index and middle finger and allow it to hang.
Repeat on the other side and, in one motion, wrap the pasta around your index finger and connect the two tips, pressing the connection points into a single thickness.
As each balanzone is shaped, place it on a clean work surface, taking care not to let it touch the other pieces.
Repeat filling and shaping with the remaining dough pieces, working one row at a time. Allow the shaped pasta to dry, uncovered, on your work surface for about 15 minutes. The balanzoni are ready to use now, or you can blanch them for future use.
Meanwhile, repeat the process with the remaining dough ball and filling.
SPINACH DOUGH
Blanched spinach gives this dough, which is used for lasagna, balanzoni, and smeraldine, its vibrant green color. The first few times I worked with Spinach Dough, I found it very disorienting. I was accustomed to egg dough, which you can see through after rolling it past a certain point to assess how thick it is.
When rolling Spinach Dough, take your time and use your sense of touch. Once you get a sense of how it feels when it's the correct thickness, aim for that every time. This knowledge comes with practice.
There's no need here for fancy baby spinach—any type from your local supermarket will do. I even know a few home cooks in Bologna who use the precooked frozen stuff. If you'd like to do the same, defrost it, dry it very well, and substitute 65 g [2¼ oz] for the fresh spinach; no need to blanch it. Either way, process the spinach until very smooth so it doesn't inhibit the dough's gluten development.
250 g [8¾ oz] fresh spinach (see headnote for a frozen option)
250 g [8¾ oz] eggs, beaten
454 g [1 lb] "00" flour
Kosher salt
Bring a large pot of water to a boil over high heat. Season the water with salt. When the salt dissolves, working in batches to avoid overcrowding, add the spinach.
Boil just until the stems soften, 30 to 40 seconds. Using a spider, remove the spinach and spread it on a tray.
Let cool for about 20 minutes. Return the water to a boil before adding the next batch. When all the spinach is cooked and cool enough to handle, wrap it in a clean, dry dish towel and squeeze out all the excess water. The spinach must be very dry.
In the bowl of a food processor, combine the spinach and eggs. Process on high speed until smooth and bright green, about 2 minutes.
MAKE THE PASTA DOUGH: Sift the flour onto your work surface and make an 8 in [20 cm] diameter well in the center. You should be able to see the work surface in the middle and the well's walls should be high enough to contain the spinach mixture.
Pour the spinach mixture into the well. Working from the interior edge of the well, use a fork to incorporate a bit of the flour with the mixture.
Continue incorporating a bit of flour at a time until the interior edge of the well becomes thin and the dough is thick and has the consistency of pancake batter. Clean off any flour mixture stuck to the fork and add it to the dough.
Using a bench scraper, scrape any flour from the work surface into the dough. Working in a clockwise motion, cut the dough together as though you are making biscuits: scrape, fold, and cut.
Continue working the dough until a shaggy mass forms, 2 to 3 minutes.
Parts of the mass will be rather wet, while other parts will be floury.
Scrape any dough from the bench scraper into the mass.
KNEAD THE PASTA DOUGH: With both hands, pull the far end of the dough toward you quickly and energetically, fold it over itself, then push it away from you using the heels of your palms. Rotate the dough a quarter turn and repeat the kneading until the dough is a compact mass, 3 to 5 minutes.
The dough will be slightly tacky.
Transfer the dough to a clean part of your work surface.
Using the bench scraper, scrape any dry bits of dough from your work surface and discard.
Wash, but do not dry, your hands and continue kneading the dough as before until it is relatively smooth with a cellulite-like texture, an indication of gluten formation, 3 to 5 minutes more.
Wrap the dough tightly, seam-side up, in plastic wrap, smoothing out any air pockets. Set aside to rest at room temperature for 15 minutes.
SHAPE THE PASTA DOUGH: Unwrap the dough. Halve it with a sharp knife, cutting in a sawing motion. On a lightly floured surface, knead one piece of dough energetically with both hands, anchoring the dough with your non-dominant hand as you pull the far end of the dough toward you, then press down, through, and away with your dominant hand. Turn the dough counterclockwise using your non-dominant hand, moving it in 1 to 2 in [2.5 to 5 cm] increments as you knead, like the hours on a clock.
If the dough feels too dry, spray it and your hands with water, a little at a time, until it has lost its dryness.
If you are closing the round ball and find the folded end (back door) is not sealing, spray that with a touch of water to help it along. Continue kneading until the dough is soft and smooth all the way around, 3 to 5 minutes. Repeat with the second piece of dough.
Place each dough ball in the middle of its own piece of plastic wrap measuring about 12 in [30.5 cm] square.
Working with one ball at a time, pull one corner of the plastic wrap up and lay it over the ball. Then, turning and rotating as you go, make 15 to 20 tiny pleated folds of plastic, almost like a candy wrapper, until it is fully and tightly sealed. The plastic wrap will follow the contour of the dough, which will create even pressure and support from all sides and prevent a flat surface or hard edge from developing when wrapping the dough. Set the dough balls aside to rest at room temperature for 2 to 3 hours, or up to 24 hours in the refrigerator, before rolling.
The dough will keep, refrigerated and tightly wrapped in plastic wrap, for up to 2 days. Do not freeze. Before rolling, set the wrapped dough on the counter and let it come to room temperature, about 30 minutes. This is a must for refrigerated egg doughs.
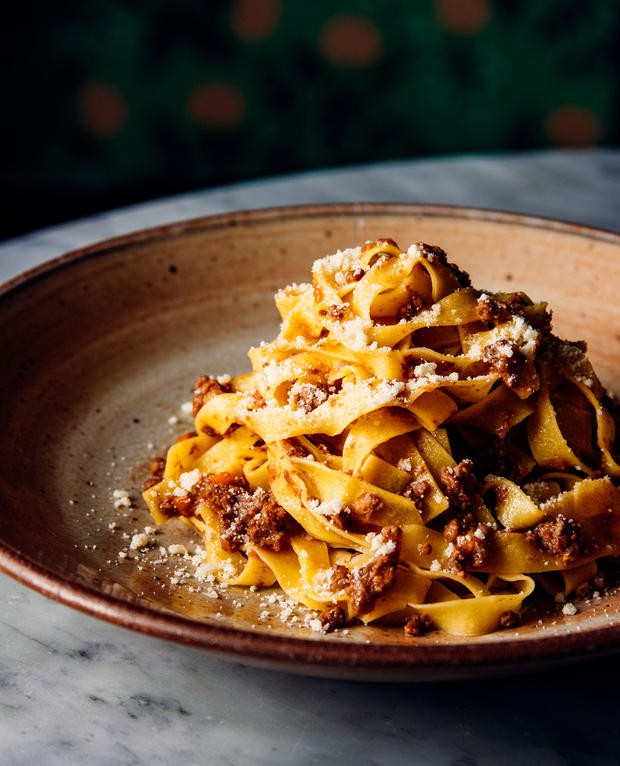
Tagliatelle with Maestra Allessadra's meat ragu
Reprinted from American Sfoglino by Evan Funke with permission by Chronicle Books, 2019
Ragù, long-simmered meat sauces, are now synonymous with Bologna and are well into their fifth century on the city's tables. They rose to popularity during the Renaissance, when Italy's nobility began to be heavily influenced by France's spiced stews. And, though you'll never get an Italian to admit it, each ragù is evidence of Francophilia dating back centuries.
Ragù della Vecchia Scuola, the maestra's classic ragù bolognese, tastes of a specific place. The prosciutto, Parmigiano-Reggiano, and vegetables all contribute the characteristics of their own terroir, so, technically, no one can actually recreate Alessandra's ragù outside her city. That doesn't mean I won't try. An important thing to realize is that if you use products bought in America, or anywhere near you, it won't taste exactly the same as it does in Bologna. But there are tricks to infuse those qualities of bolognese cooking into these dishes. I cook locally and I suggest you do, too.
Eighty percent of Italian cooking is about getting the best ingredients. The other 20 percent is about not messing them up.
Buy the best local ingredients you can afford, but know there is no substitute for Parmigiano-Reggiano. It's the backbone of this dish and it's irreplaceable. You can, however, forgo grinding the meat at home and have your butcher do it for you. You'll have about 2.5 qt [10 cups] of extra sauce when you make this recipe, but trust me, you'll be happy about that.
2¼ lb [1 kg] beef chuck, cut into 1 in [2.5 cm] cubes
½ lb [227 g] pork shoulder, cut into 1 in [2.5 cm] cubes
5 oz [141 g] pancetta, cut into 1 in [2.5 cm] cubes
5 oz [141 g] prosciutto di parma, cut into 1 in [2.5 cm] cubes
5 oz [141 g] mortadella, cut into 1 in [2.5 cm] cubes
4 celery stalks, roughly chopped
1 carrot, roughly chopped
1 large yellow onion, roughly chopped
5 oz [140 g] strutto (lard)
Kosher salt
Freshly ground black pepper
1½ cups [360 ml] dry, fruity red wine (i like sangiovese)
2 cups [450 g] passata di pomodoro (recipe follows)
2 cups [480 ml] brodo di carne (recipe follows), or low-sodium chicken broth
2 tbsp unsalted butter
1 recipe tagliatelle (recipe follows)
1 cup [100 g] finely grated parmigiano-reggiano
Using a meat grinder, or a grinder attachment, fitted with a large die, grind the beef into a large bowl. Without cleaning the grinder, grind the pork shoulder into the same bowl. Set aside. Without cleaning the grinder, grind the pancetta, prosciutto, and mortadella twice into a medium bowl. Set aside. Pass the celery, carrots, and onions through the grinder into another large bowl and set aside.
In a large heavy-bottomed pot over medium-high heat, melt the strutto. Add the ground prosciutto and pancetta and cook until the fat has rendered, about 4 minutes. Add the ground vegetables. Cook, stirring frequently, until they are golden brown and softened, about 15 minutes.
Add the ground beef and pork and generously season with salt and a small amount of pepper. Using a wooden spoon, gently mix the meat and vegetables, stirring from the bottom of the pot. Cook until the meat releases its juices, 6 to 8 minutes. Stir in the wine and cook until the contents of the pan begin to steam. Add the passata and brodo, stir to combine, and turn the heat to low.
Cook the sauce at a bare simmer, stirring occasionally, until the meat is tender and the sauce is concentrated, 5 to 7 hours. Begin tasting for tenderness and seasoning after 5 hours. (If you're using grass-fed beef, it will take a lot more time to cook than conventionally raised beef.)
Transfer 6 cups [1.2 kg] of the sauce to a large pot. (Store the extra sauce according to the instructions following.)
Place the pan over medium heat.
Bring the sauce to a rapid simmer and cook until the sauce reduces slightly, about 3 minutes. Add the butter and swirl to emulsify. Set the sauce aside.
Bring a large pot of water to a rolling boil over high heat. Season the water with salt (see page 25). When the salt dissolves, add the tagliatelle and cook until tender, 30 seconds to 1 minute.
Meanwhile, return the sauce to medium heat. Using a slotted pasta fork, transfer the pasta to the sauce and toss to coat. Add some pasta cooking water, as needed, to loosen the sauce. Serve immediately with the Parmigiano-Reggiano sprinkled on top.
The sauce will keep, refrigerated in an airtight container, for up to 5 days, or frozen for up to 6 months.
PASSATA DI POMODORO -TOMATO SAUCE
Each August, bolognese families gather to harvest, blanch, peel, and bottle tomatoes to use throughout the year. If you have your own preserved tomatoes, this would be a great place to use them. Otherwise, opt for a high quality canned version. I like the San Marzano variety for my passata and Bianco DiNapoli is my favorite domestic producer.
Makes about 3 qt [2.8 l]
10 lb [about 4.5 kg] canned whole tomatoes
¼ cup [60 ml] extra-virgin olive oil
1 garlic clove, smashed
3 sprigs marjoram
1 tbsp kosher salt
Pass the tomatoes through a food mill into a large bowl. Alternatively, in the bowl of a food processor, pulse the tomatoes on high speed until very smooth, about 1 minute.
In a large pot over medium- low heat, heat the oil until it begins to shimmer. Add the garlic and marjoram and cook until fragrant, about 1 minute. Add the tomatoes and salt and cook until the tomatoes have lost their raw flavor and the sauce has reduced slightly, about 30 minutes.
The sauce will keep, refrigerated in an airtight container, for up to 5 days or frozen for up to 6 months.
BRODO DI CARNE - MEAT BROTH
Brodo di Carne is the backbone of so many recipes in this book. You'll use it in the most traditional dish, Tortellini in Brodo, but also as a building block for many others. The simplicity of a great brodo speaks volumes. The one I make is the maestra's—it's how she makes it and how her family has for generations. Everyone's brodo is their own, and small tweaks can make each unique. One family might use more carrots, another more onion. One might use beef neck, another shank. I go for a chicken and veal shank combo, because I want to evoke la bell'aria—"the smell of the air" in Bologna, the aromas that typifi ed my favorite versions eaten there. A by-product of Brodo di Carne is a lot of simmered meat that is often used as the basis for Lesso Ripassato, a sauce for strozzapreti.
Great brodo is achieved with patience and time. It takes a full 24 hours to develop the beautiful, round, fortifying fl avors. If you rush it, it will taste rushed. You must cook it overnight, so just make sure the area around the stove and the pot is clear and that the heat is very low.
The recipe yields much more brodo than you need for any single recipe in the book. This is one of those batch recipes that bolognesi make in abundance, and so do I, especially because it is the amount of brodo that results from simmering one whole chicken. Use any leftovers by making other recipes that call for Brodo di Carne, adding to soups, or freezing what you don't need for future use.
One 3½ lb [1.6 kg] whole chicken (preferably organic), rinsed and patted dry
One 1 lb [454 g] veal or beef shank
2 celery stalks 1 large carrot
1 large yellow onion, halved 6 qt [5.7 l] cold water
In a large heavy-bottomed pot over low heat, combine the chicken, veal shank, celery, carrot, and onion. Add the water and bring to a simmer. Decrease the heat as needed to maintain a bare simmer and cook, uncovered, for about 24 hours. The brodo can bubble occasionally, but do not boil, stir, or disturb it in any way.
After 24 hours, the brodo will be golden and translucent and taste savory. Using a ladle, skim off the scum from the top of the brodo and discard. One ladleful at a time, pass the brodo through a fi ne-mesh strainer or chinois into a large container or several smaller ones. Do not pour it—the force will push impurities through the strainer and contaminate the brodo. Reserve the meats (discarding the bones) and vegetables for Lesso Ripassato (page 235; they will keep, refrigerated in an airtight container, for up to 3 days). If you are not using the brodo now, cool it completely over an ice bath before storing.
The brodo will keep, refrigerated in an airtight container, for up to 10 days or frozen for up to 3 months.
TAGLIATELLE
1 recipe sfoglia all'uovo (recipe follows), at room temperature
"00" flour, for dusting
Roll one dough ball to a thickness of 4 Post-it®
Notes on a lightly floured work surface (see page 50). Cure the sfoglia (see page 35). Fold the sfoglia in half, press gently along the crease, and unfold. Using a sharp knife, cut the sfoglia along the crease. Position the half-moon–shaped pieces of sfoglia with the round ends closest to you and the cut ends facing away from you. Starting at the round edge of one sfoglia crescent, fold the pasta 3 in [7.5 cm] over and continue to fold until you have a loose roll. Repeat with the remaining sfoglia crescent.
Beginning at the end of one roll, using a sharp knife, square off the edge and add this irregular shape to your maltagliati pile (see page 100). Continue cutting the sfoglia crosswise into ¼ in [6 mm] thick strips, adding the irregular rounded edge from the other end of the roll to your maltagliati pile. Repeat with the remaining sfoglia crescent. Using one hand, grasp 6 to 8 pasta strands in the middle. Lift them off the work surface and shake to unfurl. With your other hand, grab one end of the dangling strands, invert, and shake to remove excess fl our and to separate them from one another. Place the strands on a clean work surface in a horizontal orientation, then form into a U-shape. Repeat with the remaining dough strands. Use now or refrigerate for up to 24 hours in a high-sided container lined with paper towels and loosely covered. Meanwhile, repeat the process with the remaining dough ball.
If you are planning to dry your tagliatelle in the traditional way, shape them into nests beforehand. Gather 20 to 25 strands, grasping them fr om the middle, and lift them off the work surface. With your other hand, grab the dangling ends closest to you. Release your other hand and allow the strands to dangle over the top of your fingers. Loosely wrap the strands up and over your hand until they are completely wrapped. Lower the nest onto the work surface and release. Repeat with the remaining strands. When you're ready to cook the nests, simply drop them into boiling salted water.
SFOGLIA ALL'UOVO - EGG DOUGH
The classic recipe for sfoglia all'uovo uses 100 g of flour per large egg. In Bologna, sfoglini eyeball these ingredients, making adjustments as needed until they can feel with their fingertips that the dough is perfectly developed, a sign it will roll out into a proper sfoglia. What they are really feeling is a dough that is hydrated and has reached the ideal balance of elasticity and extensibility. If a dough has too much elasticity, it will keep bouncing back and be impossible to roll out to the desired diameter—and, by extension, thinness. If, on the other hand, the dough is too extensible (too easy to push and pull), it is overly hydrated and it will be nearly impossible for it to hold its shape once rolled.
Unlike in American restaurant kitchens, in Bologna intense debates about hydration are "not a thing." Bolognesi feel the dough and—with lots of practice—you may, too.
But here I think it's essential to provide a more concrete recipe with fewer variables. After years of experimentation, I landed on a recipe that is easy to nail anywhere. It features a precise proportion of egg to flour, which results in a 57 percent hydration dough—hydration level refers to the proportion of liquid to flour—making it especially ideal for filled pasta such as tortellini.
The moisture from the egg hydrates the flour, activating the gluten. Meanwhile, the egg white and yolk provide protein and fat, respectively, lending strength, pliability, and elasticity. I have engineered the dough so all these features are in balance and the resulting pasta has the structure and strength needed for both cut and filled pasta shapes. To that end and as noted in "Measurements" (see page 24), I use metric units ONLY for my Master Dough sfoglia recipes. Giving both the flour and egg measurements in grams ensures a better, more consistent result. Using grams also eliminates the variable of using whole eggs, which can vary slightly in weight.
PASTA DOUGH BALLS, SERVING 6 454 G [1 LB] "00" FLOUR, PLUS MORE FOR DUSTING
258 G [9.1 OZ] EGGS, BEATEN (SEE EGGS, PAGE 30, FOR MEASURING INFORMATION)
MAKE THE PASTA DOUGH: Sift the flour onto your work surface and make an 8 in [20 cm] diameter well in the center. You should be able to see the work surface in the middle and the well's walls should be high enough to contain the eggs.
Pour the eggs into the well. Working from the interior edge of the well, use a fork to incorporate a bit of the flour with the eggs. Continue incorporating a bit of flour at a time until the dough is the consistency of pancake batter.
Clean off any flour mixture stuck to the fork and add it to the dough.
Using a bench scraper, scrape any remaining flour from the work surface into the dough. Working in a clockwise motion, cut the dough together as though you are making biscuits: scrape, fold, and cut (see previous spread). Continue working the dough until a shaggy mass forms, 2 to 3 minutes. Parts of the mass will be rather wet, while other parts will be floury. Scrape any dough from the bench scraper into the mass.
KNEAD THE PASTA DOUGH: With both hands, pull the far end of the dough toward you quickly and energetically, fold it over itself, then push it away from you using the heels of your palms. Rotate the dough a quarter turn and repeat the kneading for 3 to 5 minutes until the dough is a compact mass. The dough will be slightly tacky.
Using the bench scraper, scrape any dry bits of dough from your work surface and discard. Wash, but do not dry, your hands and continue kneading the dough as before until it is relatively smooth with a cellulite like texture, an indication of gluten formation, 3 to 5 minutes more.
Wrap the dough tightly in plastic wrap, seam-side up, and smooth out any air pockets. Set aside to rest at room temperature for 15 minutes.
SHAPE THE PASTA DOUGH: Unwrap the dough. Halve it with a sharp knife, cutting in a sawing motion. On a lightly floured surface, knead one piece of dough energetically with both hands, anchoring the dough with your non-dominant hand as you pull the far end of the dough toward you, then press down, through, and away, with your dominant hand. Turn the dough counterclockwise using your non dominant hand, moving it as you knead in 1 to 2 in [2.5 to 5 cm] increments, like the hour markings on a clock.
If the dough feels too dry, spray it and your hands with water, a little at a time, until it loses its dryness. If you are closing the round ball and find the folded end (or back door) is not sealing, spray that with a touch of water to help it along. Continue kneading until the dough is soft and smooth all the way around, 3 to 5 minutes. Repeat with the second piece of dough.
Place each dough ball in the middle of its own piece of plastic wrap measuring about 12 in [30.5 cm] square.
Working with one ball at a time, pull one corner of the plastic wrap up and lay it over the ball. Then, turning and rotating as you go, make 15 to 20 tiny pleated folds of plastic, almost like a candy wrapper, until the ball is fully and tightly sealed. The plastic wrap will follow the contour of the dough, which will create even pressure and support from all sides and prevent a flat surface or hard edge from developing when wrapping the dough. Set the dough balls aside to rest at room temperature for 2 to 3 hours or up to 24 hours in the refrigerator before rolling.
The dough will keep, refrigerated and tightly wrapped in plastic wrap, for up to 2 days. Do not freeze it. Before rolling, set the wrapped dough on the counter and let it come to room temperature, about 30 minutes. This is a must for refrigerated egg doughs.
EGGS
The first time I broke open an egg at La Vecchia Scuola Bolognese, it was like magic. The yolk was so intensely colorful it practically glowed. It was not at all like the pale yellow orbs typically found in eggs back home in the United States. Thanks to a diet of insects and corn, many chickens in Italy lay eggs with yolks ranging in color from light orange to nearly red. In fact, a synonym in Italian for tuorlo (yolk) is rosso (red).
Orange-red yolks can also be attained by increasing a chicken's beta-carotene consumption, or even feeding it capsicum or marigold petals. The yolk's color influences the pigment of egg-based pasta doughs, although the hues are mellowed by the flour.
Eggs bring a lot more to bolognese pasta than just their tint. Without the fat-rich yolk, there would be no elasticity to therolled out dough—so strands, such as tagliatelle, would lack character, as would filled pastas, which benefit from a bit of stretch to contain their filling. The protein-rich albumen, on the other hand, imparts strength that gives the pasta its bite when cooked. The egg makes Bologna's most traditional pasta shapes possible. Without this main ingredient, the pages of this book would be mostly blank. No matter where you are, for the best and most beautiful dough, use the highest quality eggs you can find.